Showing posts with label Hampton Arts. Show all posts

Friday, February 17, 2017

Love you bunches

Hello again,
     Recently I celebrated my birthday and one of the things I got from my good friend, Lynda Plecken
(http://paperartscafe.blogspot.com/) was a pad of  Bienfang 170# Canvas paper. Well, I was itching to try it out so I grabbed my stamps and inks and got started.
     First I took a piece of computer paper and stamped out the outline for what I was planning. Then using my MISTI, I stamped and masked until my card looked like my outline.
    
     I just love Altenew stamps, they are so versatile. I stamped the outline of the flower with Archival ink with my Misti, then used my Ranger distress ink to stamp and watercolor the flowers and leaves. I used Spun Sugar and Worn Lipstick for the pink flowers and Barn Door and Fired Brick for the red, Peeled Paint and Forest Moss for the leaves. Then I used Stormy Sky to shadow.  Because of the texture of the paper stamping without water coloring left lines and dots in my flowers but after adding water they still had texture but the lines and dots were gone. I love the way it looks and I love this paper.
     I stamped the sentiment (Hampton Arts#jb0198) and added a few sequins. I'm very happy with this card and I will definitely be using this paper again.
     Products used:
Altenew Peony Bouquet
Bienfang 170# canvas paper 
Misti ( My Favorite Tool)
Hampton Arts #jb0198 sentiment
Inkadinkado masking paper
Ranger Archival and Distress inks
     I will be entering this card in:
Thanks for stopping by.
God Bless,
Karen


Wednesday, January 25, 2017

Black, White and a spot of Red

     Today's card took me out of my comfort zone, big time. I love to use lots of color on my cards and the challenge was to only use Black, White and Red. I think I dreamt about it last night, LOL, because when I got up this morning I knew exactly which stamps I was going to use to make it. I love the way it turned out and I think I will be trying this again soon.

Products used:
Altenew Stamp Sets( Beautiful Day and Peony Bouquet)
Ranger Archival Ink ( Black and Grey-Watering Can)
Ranger Distress ink (Fired Brick and Aged  Mahogany)
Ranger Distress watercolor paper
Hampton Arts sentiment
Canson red cardstock
Inkadinkado masking paper
Misti
     I started by stamping out the different flowers on scrap paper to get my positioning just right. Then I started stamping the first flower by using  Black to outline, then I used the Grey over the whole flower and stamped the shadows in Black, creating my focal point in the bouquet. I then masked it and stamped the second flower and the 2 smaller flowers in Black and the shadows in Grey. Again, I masked the Flowers and stamped the leaves in Black and masked them.
I stamped the rest in Black and then removed the masks. I was very happy with the result. I put down a light layer of Pumice Stone ink and water to give it depth and stamped, Thank You in Red. I finished by matting in Red.
I will be entering this card in these challenges:
                                        Make My Monday ( Black, White and a spot of Red)
                                        Addicted to Stamps and More (Anything goes)
                                         Tuesday Throwdown Challenge ( Anything Goes)
                                         Simon Says Wednesday Challenge (Anything Goes)
Thanks for stopping by,
Happy Crafting.
God Bless,
Karen

Saturday, January 21, 2017

Happy Birthday

     My card today is for a very special young women. She is my son's wife and mother to my grandchildren. I've known her since she was a child of 12 and can tell you she is and amazing women. She takes care of a house, 3 kids, a husband, a cat and dog, she's a part time nanny and she somehow goes to college full time. I love her as if she were my own daughter and so I wanted to make her a very special card for her birthday.
     For Christmas my husband went all out and got me some amazing stamps by Penny Black, Zig clean color pens, and tons more. This card was made using some of them.
     Using Penny Black Slapstick/Cling #40-447 Poppy Gems I stamped with Versa Mark and embossed in black on watercolor paper. Then using my Zig pens I colored in the flowers in 2 colors using some black seed beads for the centers. I stamped the Happy Birthday from a  Stampabilites clear titles set. The butterfly is from Hampton Arts Cling,( Once upon a time springtime set). I added Light blue zig pen around the flowers, and fussy cut 3 butterflies for the front and inside the card.
     I hope she likes this card as much as I do.
I will be entering this card in these challenges:
My Favorite Things Color Challenge #61
Penny Black At Allsorts
Penny Black Saturday Challenge


Thanks for stopping by.
Happy Crafting!
God Bless,
Karen


Snowman Shaker card

Hi all,


     Made this card for Christmas and decided to enter it in the Addicted to Stamps Challenge-
( Frosty Friends) I loved how this little guy turned out and I hope you do too. By the way, this is my first shaker card.


     The Snowman is From AI and Hampton Arts the set comes with 2 snowmen, 2snowflakes a sentiment, a snowman and snowflake die #ASTM D4236. 
The trees are from Fiskars, snow globe mini set. The snow globe is just a spellbinders circle die and the base is a digi. I colored using Ranger distress inks. I used Recollections stars glitter shapes for snow.
     The card was a big hit with my family and friends I hope you like it too!

Thanks for stopping by.
Happy crafting!
God Bless,
Karen


Monday, September 26, 2016

My Journey to Card making

      I have been crafting one thing or another most of my life. My grandmother started me off at 5yrs old doing cross stitch and needle point. My Mom was a seamstress and taught me to sew as soon as I could sit at the Singer and work the knee pedal. I taught myself to crochet when I was 18 to make a blanket for my first nephew.
    
      In 1998 I began scrapbooking. I loved creating something that was more than a photo album, something that brought the pictures to life. Something that my now grown children and grandchildren love to open up and relive the good times in there lives. I never dreamed at the time that I would someday have a room dedicated to just crafts, and that I'd have enough of that stuff to stock a store. LOL
 
      Card making came as a direct result of my love for stamping on my scrapbooking pages. I love to give gifts that I have created myself so I started making gift tags and cards for friends and family. Card making then became my favorite craft. Oh, I still scrapbook to keep up with the grandkids lives and I still crochet, but Card making seems to be my greatest love and I do it as much as possible.

       I love discovering new stamp companies and recently I stumbled onto the website of JustRite stamps. (http://justrite-papercraft.myshopify.com/) I love all these beautiful stamps and have used them on many of my cards. This company is affiliated with Spellbinders.
 
       My card today is made with a JustRite background stamp that I just fell in love with. I'm always inspired by cards with lots of colors and flowers. They make me happy so in turn, I believe they will make others happy.


Products used:

JustRite #CL-05089 Blooming Vines
Hampton Arts  (Smile)
Canson watercolor paper
Ranger distress inks
Ranger Archival ink
Misti

     I started by placing the stamp in the Misti, inking with archival ink and stamping it. The beauty of the Misti is that if the first impression isn't perfect you can re-stamp until it is. When I was happy with the outcome I started water coloring using my ranger inks and a paint brush. First the leaves, I used Peeled Paint distress ink, I painted a very lite watered down layer. When that was dry I went back to each leaf with the same color, with less water and added just a touch to the bottoms of each leaf for shadow and texture. I did the same with the flowers using Shaded Lilac distress ink.
    
     After I was done water coloring I placed my paper back into my Misti, making sure it was in the exact spot as when I stamped the first time, and stamped it again to define the out lines. Then I used Abandoned Coral distress ink and a blending brush and did the outside edges of the card.

      I cut it down to 41/8 x53/8 and wrapped a piece of purple nylon ribbon around it and tied a knot. Then I adhered it to a violet card.

      I stamped the word smile and the frame from the same set and fussy cut it out, popped it up with dimensional tape and I was done.

I will be entering this card in these challenges:


Thanks for stopping buy.
Have a wonderfully crafty day!
Karen 


Sunday, August 21, 2016

Good Morning!

I've been busy these last few days. I got several more new stamps in the mail. It always amazes me that when the mail comes and I have several packages, for days in a row, my husband never says a word. He is so good to me he says, if it makes you happy, I'm ok with it. Just don't break the bank.
I'm a very lucky girl. I digress, these are the stamps I received in just the last 2 days.


Of course I went straight to my craft room and got to work. My first card reminds me of when my boys were little and how much they loved to blow bubbles, ah....those were great times.


Products used:
PB slapstick/cling # 40-229 bubble boy
PB T for transparent #30-358 happy snippets
Ranger distress ink
Ranger watercolor paper
Ranger Archival Ink black
Gellyroll glitter pen and
Spectrum Noir clear glitter pen
Misti

I stamped the bubble boy in archival ink on my Misti  and then using my distress ink and a watercolor brush I colored him in, then back in the Misti to freshen the outlines. I used my distress inks to create the background, and the Gellyroll pen to add a little depth to the grass. I used the Spectrum Noir glitter pen on the bubbles, then stamped "life is great play" and mounted on yellow then onto a blue card.

I will be entering this card in: PB "Anything Goes With a Stamp"
                                                Simon Says Monday Challenge" Summer Fun"

Card #2 Happy Birthday
Products used:
Altenew Mini One of A Kind
Hampton Arts #SC0586 celebrate life
Ranger distress ink markers
Ranger watercolor paper
Ranger archival ink
Ribbon from my stash
Spellbinders dies #S4-425 Elegant Ovals and #S4-324 Ribbon banners
Misti

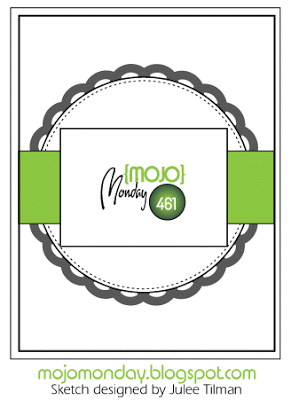
I fell in love with this little stamp as soon as I saw it. I began by inking my stamp and stamping it around the entire paper including the center. I wasn't sure where I was going with it at this time but I loved the way it looked. Then I took my water brush and lightly brushed over the stamped image and blended the colors, and used a blending tool to add color to the edges. I decided to use this background for the sketch from MOJO Monday, and the Inspiration challenge at Altenew.


So I stamped another flower and cut it out with my spellbinders die. I then cut out the next size die in the same set for the background, and the banner for Happy Birthday.
I wrapped the ribbon around the center of the background and then using a blender I added the same color to the background frame as around the edges of the card. I adhered it to the center of the card and using some dimensional tape I popped up the framed flower up in the center.  I stamped Happy Birthday on my banner and blende the edges, then attached it to the bottom of the framed flower.
I will be entering this card in:
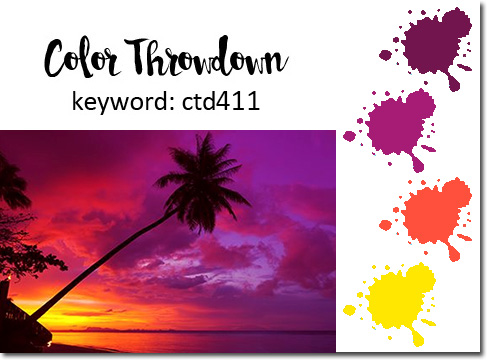
                                               Altenew 2016 Inspiration Challenge "Flamingo Inspiration"
                                               Mojo Monday "MOJO461"
                                               Seize The Birthday "anything Goes" 
                                             

Have a wonderfully crafty day !


Karen

Saturday, August 13, 2016

Watercolor cards using distress ink

I love to watercolor using my Ranger distress inks.  When I use watercolor paints or pencils I'm very rarely happy with what I've done. I can't quite get the shading right or I've used to much water and the colors run. I guess I just have to keep trying and I know I'll get the hang of it, eventually. However I love using my distress markers and inks to watercolor, I almost feel like a pro. The two cards I made today are both made using this technique and I do love the way they turned out. I also have to say that I love using my Misti, (for those of you who don't know what it is, you can check it out at SimonSaysStamp.com) it makes stamping a breeze.  

Card # 1


Products used:
PB #40-428 Scented Beauty
HA #CL401 Tapestry Background
IO #CL114 Sympathy Sentiments
Ranger distress markers and inkpads ( Spun Sugar & Forest Moss)
Ranger Archival ink (Black)
Ranger watercolor paper
Inkadinkado Masking Paper
American Crafts twine
Spectrum Noir clear glitter pen
Clarity brushes
My Sweet Petunia, Inc. Misty


I cut my paper to 41/4 x51/2 and placed it in the corner of the Misti securing it with magnets. Then I positioned my stamp and closed the lid, sticking the stamp to it. I opened the Misti and used my distress markers to color the stamp, and closed the Misti. I did this twice. I removed my paper, leaving the stamp in passion in the Misty. Using a paintbrush and a small amount of water, (I used the back of my hand to remove the excess water from my brush) I drew the ink out to the edges of each petal one at a time until done, repeating with the second flower and the leaves. When I finished, I placed my paper back into my Misti and inked the stamp once more very lightly and stamped the image again to add a subtle edge. Then I cleaned and removed the stamp and repositioned my paper to the center of the Misti. Using the masking paper I stamped the roses again and the fussy cut the mask out and placed over my finished image. I used removable adhesive on the back of my paper to keep it in place, since I was going to stamp over the whole thing. I positioned my background stamp over my paper and closed the Misti so it would stick. Then I inked it using the black Archival ink. I stamped it and there were some missing spots so I inked the stamp again and stamped it again, success. I love my Misti. I cut my paper to 41/4 x 53/8 then using my Clarity brushes and some Spun Sugar inked the edges, and wrapped the twine around the left side crossing it and knotting it. I stamped the Sentiment on some white card stock using black Archival ink and matted it on black card stock and adhered it to the top right of the panel. Then I adhered the panel to a black card.

Card#2

Products used:
PB #40-312 Sunny Pair
PB #30-358 Happy Snippets
Spellbinders #S5-218 A2 Devine Eloquence
Ranger Distress Ink ( Rusty Hinge, Squeezed Lemonade, Peeled Paint, Ground Espresso, Vintage Photo and Bundled Sage)
Ranger watercolor paper 
My Sweet Petunia, Inc. Misti
I did everything the same for this card up till the background stamp. Instead of using a background stamp I used some Squeezed Lemonade and water to go around the flowers leaving some white at the top and bottom. Then I cut it out using my spellbinders die. I used  Bundled Sage around the whole frame. I stamped my sentiment, "a little bit of sunshine for you" and used dimensional tape to adhere it to a white card. I didn't like that it was so white so I added just a touch of Squeezed Lemonade around the edges of the card.
As I mentioned at the top of the page my Favorite Technique is water coloring with Distress Inks.  
I will be entering these cards in: