Showing posts with label Penny Black. Show all posts

Friday, March 3, 2017

Prismacolor pencils #The Daily Marker 30 Day

Hello,
      Well here it is day 3 in, The Daily Marker 30 Day Challenge. I got a set of 132 Prismacolor soft core colored pencils for Christmas, from my wonderful hubby, and to tell you the truth I was having a little trouble getting used to them. Water coloring is my go to, but I really wanted to expand my knowledge and do something different.  So, I watched some YouTube videos on Prismacolor pencils,
I saw several different ways to use these pencils and picked the one that I thought would work best for me. Then I got to work. For a first try I think I did well.
      I used 3 shades of red and 3 shades of green and a black. I'm pretty happy with the way it turned out and I will definitely be working with my pencils again soon.
       After I colored the image I fussy cut it out and using my Xyron I adhered them to another piece of card that I had stamped my sentiment and the outline of the flower, I used Distress ink to shade and popped it up with some foam on a gray card.
Products used:
Penny Black divine #40-372 and heartfelt #30-286
Prismacolor soft core colored pencils
Ranger Distress ink
Ranger Archival ink
I will be linking this card to:The Daily Marker 30 day coloring challenge
Thanks for stopping by.
God Bless,
Karen

Wednesday, September 7, 2016

First Ever Shaker Card

     Lately I've  been trying as many new techniques as possible, this one gave me the most trouble when I thought it would be simple. Shaker boxes, Ugh!
     I started out with a plan and picked out all my stamps, inks and stencils, then straight to work. The end result is better than I thought but getting there was a nightmare, LOL! I had to replace the Acetate 3 times because of problems I was having with the sequins getting stuck in the background images. Finally I got  some micro beads and that did the trick.
 
    This is the end result. I just fell in love with these cute little guys and had to find a way to use them all.


Products Used:

Imaginisce Snag'em Stamps Blowfish, Crab, Dolphin and Octopus
Simon Says Wave Stencil #SSST121357
Deep Red (Water droplets background stamp)
Ranger/Dylusions # DYR37798 Ocean Backgrounds
Ranger/Dylusions Spray Inks (London Blue and Calypso Teal)
Ranger #12 DYR47308 mixed media tags
Ranger distress ink
ColorBox  Frost White pigment ink
Gelly Roll  glitter pens
Hero Arts gems
Beader's Paradise Micro Beads
Penny Black #30-358 Happy Snippets
Grumbacher Miskit
Martha Stewart punch


     First I started with the mixed media tag. I sprayed it with water, then  two different colors of ink, sopping up the excess ink with a roll of paper towels. I cut it down to 5x7 because I knew I would need a larger area for the stamped images and the background pieces.  I placed the wave stencil over the background and sprayed with water, let it sit for a few seconds then rolled the paper towels over it to pull some of the ink out. I did this twice to cover the entire background. With my water droplets stamp and the frost white ink pad I stamped bubbles onto the background, and a few fish from my ocean backgrounds. I set that aside.
     Using the Oceans backgrounds set I stamped coral and seaweed on another tag and colored them with my Dylusions inks. I have water brushes filled with every color ink. Then I fussy cut them out and added them to my background.
    I then stamped the Blowfish and others on 110lb card stock and used a paint brush to apply Miskit to the eyes, flowers, fins and spots on each of the images, and let it dry for 5 min; when the Miskit was dry I used Ranger distress inks and blender tool to color the images. I rubbed the Miskit off and used the Gelly Roll pens to color in the flowers, Fins and spots. I fussy cut them out and edged each with a black marker to make them pop.
    Two layers of dimensional adhesive, the acetate and some 110lb card stock around the edges, I used a Martha Stewart punch for the top and used Vintage Photo distress ink over the edges. I stamped the sentiment and added the gems. My fish tank shaker box card is finally done. It was a lot of work but well worth it. Not bad for a first try, I think.

I will be entering this card in these challenges:


Thanks for stopping by!
Have a Wonderfully Crafty Day!!

Karen


Tuesday, September 6, 2016

CAS and Watercolor

It's been a very busy week, Bridal shower, visiting my sister-in law who's been ill, Not feeling quite up to par myself for a few days, crafting with my buddy Lynda, shopping for my Granddaughters 7th birthday, they grow up way to fast, a big Labor Day party Sunday and now I have to shop for a dress to wear to my Nieces wedding this weekend. What a crazy week!
Ok, now that I got that off my chest, I did have some time yesterday to relax and let my MOJO free.
I just got another shipment of fun in the mail and finally got some time to use some of it.


I played all afternoon yesterday and as a result I made four cards and started quite a few others.
My card for today is a Watercolor Stamped card.


Products used:

PB #40-452 Bejeweled
PB #30-353 Words of Kindness
Ranger distress mini ink pads
Ranger Archival ink
Ranger distress blending tool
Canson 130lb watercolor paper
Misti


These was an easy one. I placed my stamp in the Misti on my watercolor paper, where I wanted the flower, then closed the cover to adhere the stamp to the top. then using my distress markers, (Salty ocean, Tumbled Glass, Ground Espresso, Peeled paint and Forest Moss) I colored the flower and used the darker colors to shadow. Then I misted the whole stamp with water and closed the Misti, and pressed down. I love this technique and I use it quite a bit, using different amounts of water to get different effects.  I removed the stamped paper from the Misti and use my distress blending tool to add some Wild Honey distress ink to the right of the flowers. Then I selected my sentiment and stamped it using Archival ink. 


I will be entering this card in:          Love To Scrap "Flower Power"
                                                          Penny Black and More "Add A Sentiment"
                                                          Simon Says Wed. Challenge "Anything Goes"


Thanks for stopping by!
Have a wonderfully Crafty Day!!

Karen


Sunday, August 28, 2016

Hello Friend Mermaid card

I've had this beautiful Stampendous Mermaid stamp for a while and I couldn't  resist using her for Simon Says challenge Go Fish.


Products used:
Spellbinders Majestic Labels Twenty Five
Spellbinders S4-237 Floral Flourishes
Stampendous Mermaid
Penny Black 30-172 April Showers
Imaginisce Sea Shells
Yasutomo shimmer paints
Ranger Distress ink, watercolor paper, Archival ink
Deep Red bubbles background M1N4B5
Colorbox pigment White
Spectrum Noir clear Glitter pen
Misti

I started with my Spellbinders die and cut the outside frame from some beautiful aqua blue card from my stash. Then I cut the center panel from watercolor paper. I placed it in my Misti making sure to mark where it edges were for later. I stamped the Mermaid and painted her with the shimmer paints then stamped again on the Misti.
Then using masking paper I covered her and Inked my background with my distress inks and randomly stamped the bubbles all around her. Using dimensional tape I popped up the outside frame and then adhered the Mermaid flat onto the center of the white card. I took another piece of watercolor paper and using my distress inks I painted it green with two shades of green and a large paint brush, then I cut the floral flourishes for sea weed. I stamped the sea shells, painted them and fussy cut them out, then arranged them using dimensional tape and glue. I used my Glitter pen on the sea weed and stamped my sentiment using archival ink.
Here's a close up of the shimmer of her tail and the glitter on the sea weed.

I will be entering this card in these challenges:
                                                                          Simon Says Monday Challenge "Go Fish"
                                                                          All Sorts"Use at least 2 Dies"
                                                                           Love to Scrap " Anything Goes"
Have a wonderfully crafty day!

Karen


Thursday, August 25, 2016

No line Water coloring

Today I practiced no line water coloring and I was very surprised with the result. I have done this many times without much success, but today I guess I was just in the right place, because I didn't do to bad. I stamped it using Ranger distress ink "Antique Linen". I added water to each petal individually and then the color and let it work it's magic. It's still not perfect but I'm very happy with the result. I will continue to work on this technique till I am satisfied that I can do no better.


Products used:
Stamp-N-Up Lg. Lilly stamp
Ranger distress ink
Watercolor paper
PB #30-105 gratitude

I will be entering this card in: Less is More "Exotic"
                                                Allsorts  "Fabulous Florals"

Have a wonderfully crafty day!

Karen


Sunday, August 21, 2016

Good Morning!

I've been busy these last few days. I got several more new stamps in the mail. It always amazes me that when the mail comes and I have several packages, for days in a row, my husband never says a word. He is so good to me he says, if it makes you happy, I'm ok with it. Just don't break the bank.
I'm a very lucky girl. I digress, these are the stamps I received in just the last 2 days.


Of course I went straight to my craft room and got to work. My first card reminds me of when my boys were little and how much they loved to blow bubbles, ah....those were great times.


Products used:
PB slapstick/cling # 40-229 bubble boy
PB T for transparent #30-358 happy snippets
Ranger distress ink
Ranger watercolor paper
Ranger Archival Ink black
Gellyroll glitter pen and
Spectrum Noir clear glitter pen
Misti

I stamped the bubble boy in archival ink on my Misti  and then using my distress ink and a watercolor brush I colored him in, then back in the Misti to freshen the outlines. I used my distress inks to create the background, and the Gellyroll pen to add a little depth to the grass. I used the Spectrum Noir glitter pen on the bubbles, then stamped "life is great play" and mounted on yellow then onto a blue card.

I will be entering this card in: PB "Anything Goes With a Stamp"
                                                Simon Says Monday Challenge" Summer Fun"

Card #2 Happy Birthday
Products used:
Altenew Mini One of A Kind
Hampton Arts #SC0586 celebrate life
Ranger distress ink markers
Ranger watercolor paper
Ranger archival ink
Ribbon from my stash
Spellbinders dies #S4-425 Elegant Ovals and #S4-324 Ribbon banners
Misti

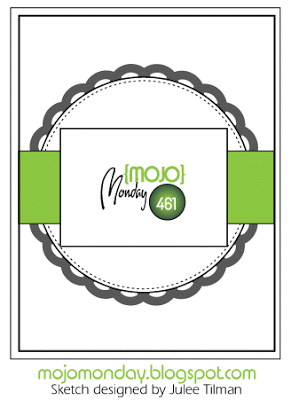
I fell in love with this little stamp as soon as I saw it. I began by inking my stamp and stamping it around the entire paper including the center. I wasn't sure where I was going with it at this time but I loved the way it looked. Then I took my water brush and lightly brushed over the stamped image and blended the colors, and used a blending tool to add color to the edges. I decided to use this background for the sketch from MOJO Monday, and the Inspiration challenge at Altenew.


So I stamped another flower and cut it out with my spellbinders die. I then cut out the next size die in the same set for the background, and the banner for Happy Birthday.
I wrapped the ribbon around the center of the background and then using a blender I added the same color to the background frame as around the edges of the card. I adhered it to the center of the card and using some dimensional tape I popped up the framed flower up in the center.  I stamped Happy Birthday on my banner and blende the edges, then attached it to the bottom of the framed flower.
I will be entering this card in:
                                               Altenew 2016 Inspiration Challenge "Flamingo Inspiration"
                                               Mojo Monday "MOJO461"
                                               Seize The Birthday "anything Goes" 
                                             

Have a wonderfully crafty day !


Karen

Saturday, August 13, 2016

Watercolor cards using distress ink

I love to watercolor using my Ranger distress inks.  When I use watercolor paints or pencils I'm very rarely happy with what I've done. I can't quite get the shading right or I've used to much water and the colors run. I guess I just have to keep trying and I know I'll get the hang of it, eventually. However I love using my distress markers and inks to watercolor, I almost feel like a pro. The two cards I made today are both made using this technique and I do love the way they turned out. I also have to say that I love using my Misti, (for those of you who don't know what it is, you can check it out at SimonSaysStamp.com) it makes stamping a breeze.  

Card # 1


Products used:
PB #40-428 Scented Beauty
HA #CL401 Tapestry Background
IO #CL114 Sympathy Sentiments
Ranger distress markers and inkpads ( Spun Sugar & Forest Moss)
Ranger Archival ink (Black)
Ranger watercolor paper
Inkadinkado Masking Paper
American Crafts twine
Spectrum Noir clear glitter pen
Clarity brushes
My Sweet Petunia, Inc. Misty


I cut my paper to 41/4 x51/2 and placed it in the corner of the Misti securing it with magnets. Then I positioned my stamp and closed the lid, sticking the stamp to it. I opened the Misti and used my distress markers to color the stamp, and closed the Misti. I did this twice. I removed my paper, leaving the stamp in passion in the Misty. Using a paintbrush and a small amount of water, (I used the back of my hand to remove the excess water from my brush) I drew the ink out to the edges of each petal one at a time until done, repeating with the second flower and the leaves. When I finished, I placed my paper back into my Misti and inked the stamp once more very lightly and stamped the image again to add a subtle edge. Then I cleaned and removed the stamp and repositioned my paper to the center of the Misti. Using the masking paper I stamped the roses again and the fussy cut the mask out and placed over my finished image. I used removable adhesive on the back of my paper to keep it in place, since I was going to stamp over the whole thing. I positioned my background stamp over my paper and closed the Misti so it would stick. Then I inked it using the black Archival ink. I stamped it and there were some missing spots so I inked the stamp again and stamped it again, success. I love my Misti. I cut my paper to 41/4 x 53/8 then using my Clarity brushes and some Spun Sugar inked the edges, and wrapped the twine around the left side crossing it and knotting it. I stamped the Sentiment on some white card stock using black Archival ink and matted it on black card stock and adhered it to the top right of the panel. Then I adhered the panel to a black card.

Card#2

Products used:
PB #40-312 Sunny Pair
PB #30-358 Happy Snippets
Spellbinders #S5-218 A2 Devine Eloquence
Ranger Distress Ink ( Rusty Hinge, Squeezed Lemonade, Peeled Paint, Ground Espresso, Vintage Photo and Bundled Sage)
Ranger watercolor paper 
My Sweet Petunia, Inc. Misti
I did everything the same for this card up till the background stamp. Instead of using a background stamp I used some Squeezed Lemonade and water to go around the flowers leaving some white at the top and bottom. Then I cut it out using my spellbinders die. I used  Bundled Sage around the whole frame. I stamped my sentiment, "a little bit of sunshine for you" and used dimensional tape to adhere it to a white card. I didn't like that it was so white so I added just a touch of Squeezed Lemonade around the edges of the card.
As I mentioned at the top of the page my Favorite Technique is water coloring with Distress Inks.  
I will be entering these cards in: